
10 Social Media Goals For Marketers
Jul 8, 202620 minutes
ContentStudio API plan is now available. Create automations using Claude, Zapier, n8n, make, etc. Explore plan!
Written by
Wasiq NaeemPublished
Updated
Instagram Reels are short, engaging video clips, typically lasting between 15 and 90 seconds, explicitly designed to capture viewer attention and increase visibility on Instagram. Initially introduced in 2020 to compete with TikTok, Reels quickly became a critical feature for creators and brands seeking organic growth and audience engagement. These short videos enable users to share concise yet impactful content, leveraging trends, music, and creativity to reach broader audiences. Understanding the perfect dimensions for Instagram Reels in 2025 is essential to maximize visibility, engagement, and overall effectiveness on the platform.
Instagram Marketing
Schedule your Instagram posts, Reels, and Stories, and get recommended best time to publish for maximum engagement.
Get Started for FREE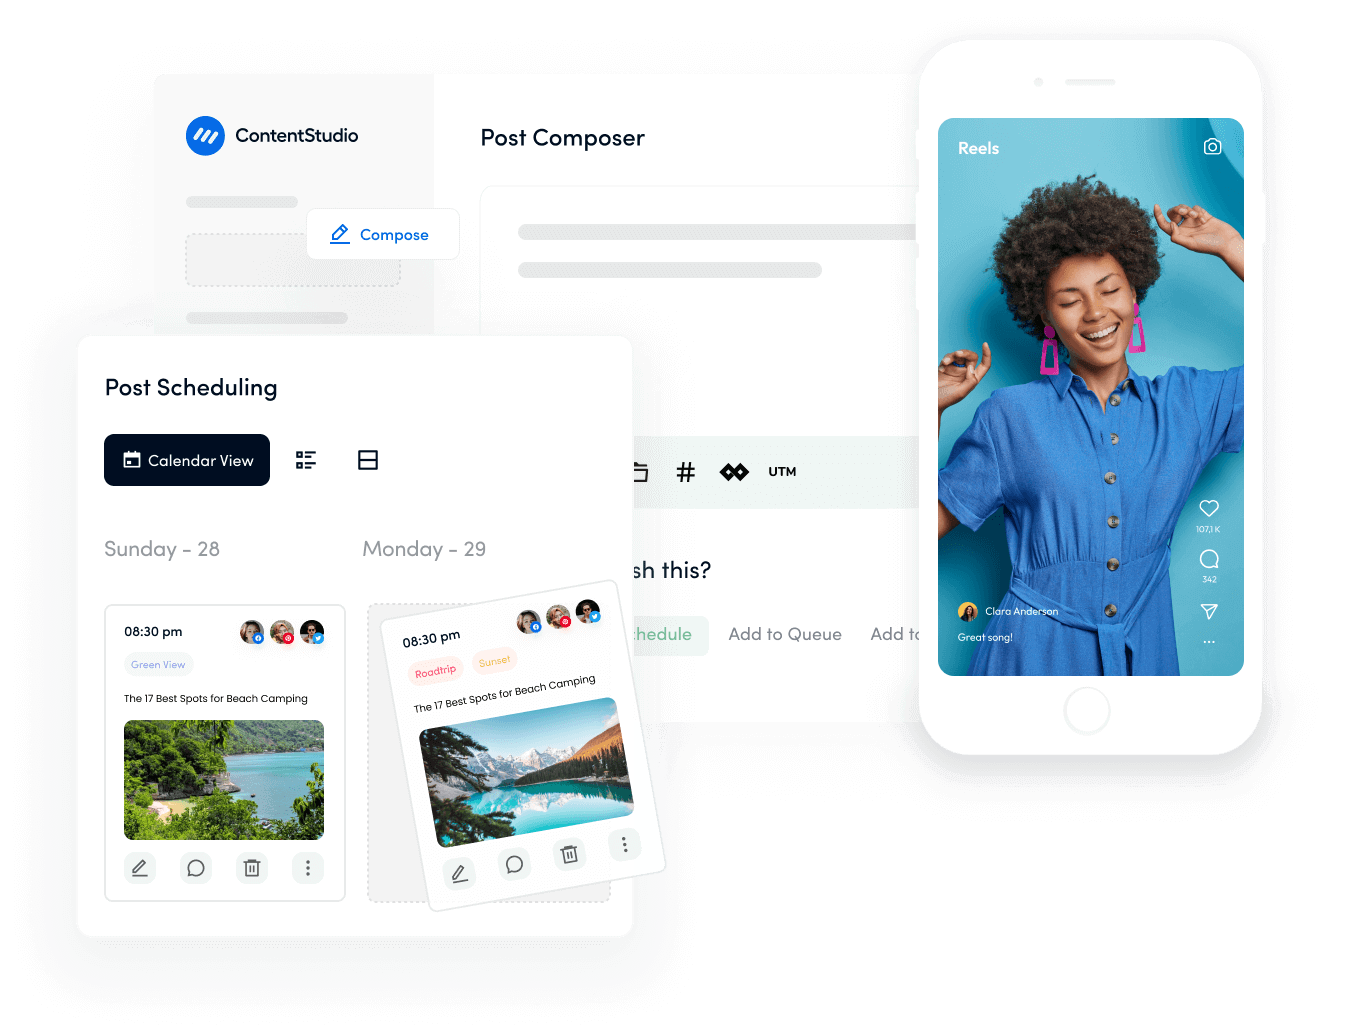
Getting the size of your Instagram Reels right is crucial for both appearance and performance. If you don’t follow Instagram’s recommended dimensions, your video could end up awkwardly cropped, with meaningful content cut off or hidden. Imagine a text caption or logo in your video that gets partially chopped because it falls outside the visible area – this can look unprofessional and distract viewers.
Using the correct size (1080 × 1920 pixels, as we’ll detail later) ensures your Reel fills the screen with a crisp, full-frame image without black bars or blurriness. Instagram explicitly notes that content outside the proper 9:16 frame “risks getting cropped,” which can negatively impact the viewing experience.
Beyond aesthetics, size can have an indirect impact on engagement. High-quality, full-screen videos are more likely to keep viewers watching. A clear, properly sized Reel looks more professional and can signal to the Instagram algorithm that users are enjoying your content, as they’re less likely to scroll past a poorly formatted video.
In short, optimized Reel dimensions ensure your content “shines” instead of suffering from awkward crops or pixelation, helping you retain viewer attention. For anyone aiming to go viral, adhering to the ideal sizes is a foundational step to make sure nothing in your Reel detracts from the message or entertainment value.
Both Reels and Stories are vertical Instagram formats, but they serve distinct purposes and target different audiences.
Reels are designed for discovery – they’re public by default and can be seen by anyone, often reaching users who don’t follow you. In contrast, Stories (which disappear after 24 hours) are primarily shown to your current followers and focus on sharing moments or updates with that existing audience. This means Reels have much greater potential to go viral or attract new followers, whereas Stories are great for engaging your loyal fans with candid or behind-the-scenes content.
Also Read: How to quickly measure social media reach in 2025
A Reel lives on your profile (in the Reels tab and optionally on your main grid) indefinitely, accumulating views and engagement over time. Stories expire after 24 hours (unless saved as Highlights), so any engagement they get is fleeting. For marketers and creators, a viral Reel can keep gaining likes, comments, and shares for days or weeks, whereas a Story’s impact is short-lived.
Instagram Stories are interactive – you can add polls, Q&As, quizzes, swipe-up links (or link stickers), and other stickers that encourage direct responses. Story viewers can reply via direct message, and these interactions are one-on-one. Reels, on the other hand, allow public comments, likes, and shares. Users engage with Reels in a similar way to regular posts (or like TikTok), meaning your content is open to public reaction and discussion. Stories are great for quick updates or announcements with interactive elements, while Reels emphasize creative editing (audio, AR effects, timed text) and shareability to the broader Instagram community.
Both formats use a full-screen 9:16 aspect ratio, but Reels can be longer, whereas Stories typically play in 15-second segments (Instagram now allows up to 60-second continuous Story clips). Because Reels are typically edited for entertainment or educational purposes, they tend to be more polished, whereas Stories are often shot spontaneously.
Knowing the exact dimensions for Reels is essential to ensure your videos display correctly on Instagram’s interface. The platform has specific requirements and best practices for Reel size, aspect ratio, thumbnails, and more. In 2025, Instagram’s guidelines remain focused on the 9:16 vertical format to provide a seamless full-screen experience on mobile devices. Let’s break down each dimension and related spec in detail:

The recommended size for Instagram Reels is 1080×1920 pixels, which matches the standard smartphone vertical screen aspect ratio of 9:16. This ensures your Reel fills the screen without black bars or cropping, offering a sharp, professional appearance.
It’s the same resolution used for Instagram Stories and other vertical formats, making it ideal for consistent content creation across various platforms. Uploading in higher resolutions like 4K won’t improve quality—Instagram will downscale it to 1080p. Lower resolutions, on the other hand, may appear pixelated when upscaled. Sticking to 1080×1920 helps preserve quality while keeping file sizes manageable.
The ideal aspect ratio for Instagram Reels is 9:16—a vertical format that matches the shape of a smartphone screen. It fills the entire screen naturally, making the content feel immersive and viewer-friendly. While Instagram allows uploads between 1.91:1 (wide) and 9:16, only the 9:16 aspect ratio displays optimally.
Wide videos often show blank space above and below, and square (1:1) videos get padded, affecting visual impact. Instagram may auto-crop or center such content, which can cut off important visuals. To avoid this, always shoot and edit Reels in 9:16. This ensures your video appears as intended, without cropping or letterboxing, and provides the best viewing experience, key to keeping your audience engaged and boosting visibility.
When uploading a Reel, you can select a cover image shown in your Reels tab, feed, or profile grid. For best results, design your cover at 1080×1920 pixels (9:16 aspect ratio), ensuring it matches the Reel’s dimensions for full-screen clarity. Most creators either pick a standout video frame or upload a custom graphic.
However, cover images display differently across the app. The full 9:16 format appears in the Reels tab, but in the profile grid or feed preview, it’s often auto-cropped to a 1:1 square or 4:5 portrait. Place text and focal visuals within the central 1080×1080 area to avoid losing key elements. Centered titles or visuals ensure your cover remains impactful, even when cropped, giving your Reel a professional and consistent look everywhere it appears.
Find Out: Facebook cover photo size (quick guide)
Frame size refers to the resolution of each video frame—ideally 1080 × 1920 pixels for Instagram Reels. This 9:16 vertical format ensures your Reel displays full-screen without black bars or awkward stretching. If you upload videos with different dimensions, Instagram resizes them to fit, which may result in cropping or padding.
When viewed full-screen, Reels maintain their 9:16 frame. However, in the Instagram feed, your Reel may be cropped to a 4:5 display, cutting off the top and bottom 10%. The Reel preview centers this crop, meaning important visuals near the edges could be missed unless the user taps to expand it. Additionally, UI overlays, such as captions, usernames, and action buttons, appear in the top and bottom areas. That’s why it’s best to keep essential visuals and text within a safe, central zone. Treat 1080×1920 as your canvas, but design with interface constraints and cropping in mind.
Reel thumbnails are the images displayed in grid layouts, such as your profile or Explore page. They’re typically auto-cropped from the Reel’s cover image and displayed as a 1:1 square in your profile grid. This square is taken from the center of your original 1080×1920 cover. For best results, design your cover with the central 1080×1080 area in mind, ensuring key visuals and text stay centered and visible.
On the Explore page, thumbnails may appear as either a square or a 4:5 rectangle, depending on Instagram’s layout. You don’t need to upload a separate square image—Instagram will crop it automatically. However, if important elements are placed too close to the top or bottom of the cover, they may get cut off. Designing with this central crop in mind ensures your thumbnail remains clear, balanced, and visually appealing across all display formats.
Reels support captions of up to 2,200 characters—the same limit as regular Instagram posts. This includes letters, numbers, emojis, and spaces, providing creators with ample room to add context, calls to action, or hashtags. However, lengthy captions aren’t always compelling. Only the first ~125 characters (about two lines) are visible in the viewer before getting cut off with a “… more.”
Related Read: How to add captions to Reels?
To grab attention, place the most important information, like a hook or value proposition, at the beginning. You can use the rest for Instagram Reel hashtags or additional context. Up to 30 hashtags are allowed in a Reel caption, just like in other posts, and many creators use them to boost discoverability. Alternatively, hashtags can be placed in the first comment. Instagram hasn’t introduced any special character limits for Reels, but shorter, well-structured captions usually perform better in terms of engagement and retention.
As of 2025, Instagram Reels can be up to 15 minutes long. This is a major shift from earlier limits of 15 to 60 seconds. Any video under 15 minutes is now treated as a Reel, aligning with Instagram’s unified video format. If you record within the app, the limit is typically 90 seconds or 3 minutes, depending on your access level.
To go longer, creators typically edit externally and upload from their device or desktop. Third-party tools also support full-length uploads. While 15 minutes is the max, short Reels (especially 5–30 seconds) often perform better. Instagram’s algorithm favors quick, rewatchable content that boosts engagement. Many top-performing Reels are under a minute for this reason. Use the full time if your content calls for it, but always aim to hook viewers in the first few seconds to increase retention and shares. Length matters, but impact matters more.
Creating a Reel isn’t just about the 1080×1920 dimensions – it’s also about where within that frame you place your content. “Safe zones” refer to areas of the frame that will definitely be visible to viewers without being covered by interface elements or cut off in certain views. If you keep text, graphics, or key visuals within those safe zones, you can be confident everyone sees them. Let’s break down the primary considerations for Reel-safe zones:
In the full-screen Reel view, the top and bottom of your video are not ideal for important content. At the bottom, Instagram overlays the caption, audio title, and comment field on top of the video. This typically occupies roughly the lower ~200-250 pixels of the screen. Anything sitting in that area (for example, subtitles placed too low) might be obscured by the UI or be hard to read. Similarly, the top of the screen may display the user’s name or a subtle gradient, and on some devices, the camera notch or status bar might overlap a tiny portion.
A general rule from Instagram’s guidelines is to avoid placing text or logos near the top and bottom edges – one recommendation is to leave about a 250px buffer on all sides. This ensures no critical elements get cut off or hidden behind interface icons.
While Instagram doesn’t place UI elements on the extreme left or right of the video, you should consider the cropping that occurs in certain previews. As mentioned earlier, when a Reel is viewed in the main feed (without tapping to full screen), Instagram may crop the video to a 4:5 ratio. This cropping usually chops off some of the top and bottom, but not the sides (since 4:5 is the same width, narrower height). So, side edges are generally safe from feed cropping.
However, if your Reel’s cover is shown in a square thumbnail (like on your profile grid), the extreme left and right will be cut off. It’s wise not to have any essential subject matter cut off at the very edge of the frame. Following the 250px inward guideline covers this as well, effectively keeping content away from all edges.
Many creators recommend keeping content within the “central 80%” of the frame. Practically, if you avoid the outer ~10% margins on each side, your content will be in a safe zone. Hootsuite advises ensuring that “the most important elements of your video are centered in the frame, and nothing vital is lurking around the edges.” This way, whether the Reel is viewed full screen, in-feed, or as a thumbnail, the core of your visuals and text remains visible and clear.
For instance, if you add captions (text subtitles) to your Reel, place them somewhere in the middle area of the screen – not too low or too high – so that they’re always readable.
In practice, you might design a placeholder overlay when editing: a box in the middle of your 1080×1920 frame (say 880×1420 pixels in the safe area) to guide where to place text or logos. Keep all essential elements inside that box. When filming, try to avoid placing a presenter’s face directly at the top edge or a call-to-action button at the very bottom. Give everything some breathing room from the borders.
Instagram compresses Reels to improve loading speed and playback across devices. To maintain quality, it’s important to understand how this compression works and prepare your video accordingly.
Reels under 10 minutes should ideally stay below 650 MB, though Instagram supports up to 4 GB for longer videos. A typical 1080p Reel won’t exceed this unless it’s lengthy or uses a high bitrate. Uploading from mobile benefits from smaller file sizes to avoid slow processing or failed uploads.
Use the MP4 format with H.264 video codec and AAC audio for smooth compatibility. These are Instagram’s recommended settings and standards across most devices. While MOV files are accepted, they are converted, which may slightly impact their quality. Maintain a frame rate of at least 30 FPS to ensure your Reel plays without stutter.
Instagram scales down videos wider than 1080 pixels to fit its 1080 px width standard. Uploading a 4K file won’t result in sharper visuals—just more compression. Exporting directly in 1080×1920 resolution ensures clarity and saves processing time. Avoid low-resolution videos (below 720p), as upscaling can result in a blurry output.
To reduce file degradation, start with a high-quality video. Aim for a bitrate between 8 and 12 Mbps for 1080p. Very low-bitrate files may appear pixelated after compression, while overly high bitrates are downsampled with no added benefit. Stick to a balance for optimal results.
Enable this setting in Account > Data Usage to prevent unnecessary compression, especially on slower networks. It preserves detail and clarity, ensuring your Reels look their best when viewed on different devices.
Creating an engaging Instagram Reel involves careful planning, recording, editing, and publishing. Here’s a concise, practical guide to making your Reel stand out:
Begin with a clear idea or message—such as a tutorial, a behind-the-scenes look, or an entertaining skit—that immediately captures viewers’ attention. Outline your concept, and length (15–90 seconds recommended), and storyboard complex sequences if necessary. Research trending audio and challenges on the Reels Explore page to stay relevant. Thorough planning saves time and ensures your Reel effectively engages your audience from the start.
P.S. Explore the intuitive social media content calendar to plan your content effectively!
Launch Instagram, tap the “+” icon, and select “Reel.” Alternatively, swipe right and select “Reels” at the bottom. The Reels interface includes various creative tools such as music, speed adjustments, effects, timer, and alignment options to enhance your footage.
You can record directly within Instagram or upload clips from your gallery. Record, press, and hold the capture button to film segments sequentially, utilizing built-in creative tools such as audio sync, AR effects, and timers for hands-free filming.
To upload, select existing clips from your device’s gallery and trim as necessary. Ensure your total Reel duration matches Instagram’s limits (up to 90 seconds in-app or 15 minutes when uploaded externally). Delete and retake segments if needed using the delete icon, ensuring your final video flows smoothly.
The Alignment tool creates seamless transitions between clips by showing a ghosted frame of your previous shot, allowing precise positioning. This is ideal for transformation or before-and-after videos. Tap the align icon (represented by overlapping squares) before recording each subsequent clip to enhance continuity and create polished transitions in your Reel.
After filming, tap “Preview” to edit your footage. Add or adjust music, choosing from Instagram’s extensive audio library. Insert text overlays using the “Aa” icon, setting timing to synchronize captions with video segments. Enhance your Reel further with stickers, GIFs, emojis, and drawings for decoration. Apply color filters or additional AR effects in preview mode. Ensure critical text stays within safe zones to avoid being obscured by interface elements. Review your edits carefully to maintain smooth transitions, engaging visuals, and clear messaging before proceeding.
Next, choose an attractive cover by selecting a frame from your video or uploading a custom image from your gallery. Use Instagram’s crop guide to center crucial elements, as cover images are displayed in a square thumbnail format on profiles. Write a concise caption, include relevant Instagram Reel hashtags, and optionally tag people or add a location. Enable the “Also share to Feed” option to boost initial exposure.
Tap “Share” to publish your Reel. Once uploaded, it appears in your profile’s Reels tab and may also appear in the Explore feed. Monitor engagement metrics (likes, comments, shares) using Instagram Insights. Early interaction helps boost visibility, so share your Reel on your Stories or directly with friends. Respond actively to comments and user interactions to encourage further engagement.
Analyze your Reel’s performance to inform future content strategies, continuously refining your approach for higher reach and greater viral potential.
Creating compelling Reels is crucial, but consistently planning and publishing them at optimal times is equally important. ContentStudio, an all-in-one social media management platform, simplifies this process by allowing you to plan, schedule, and analyze content for Instagram and other networks from a single dashboard.
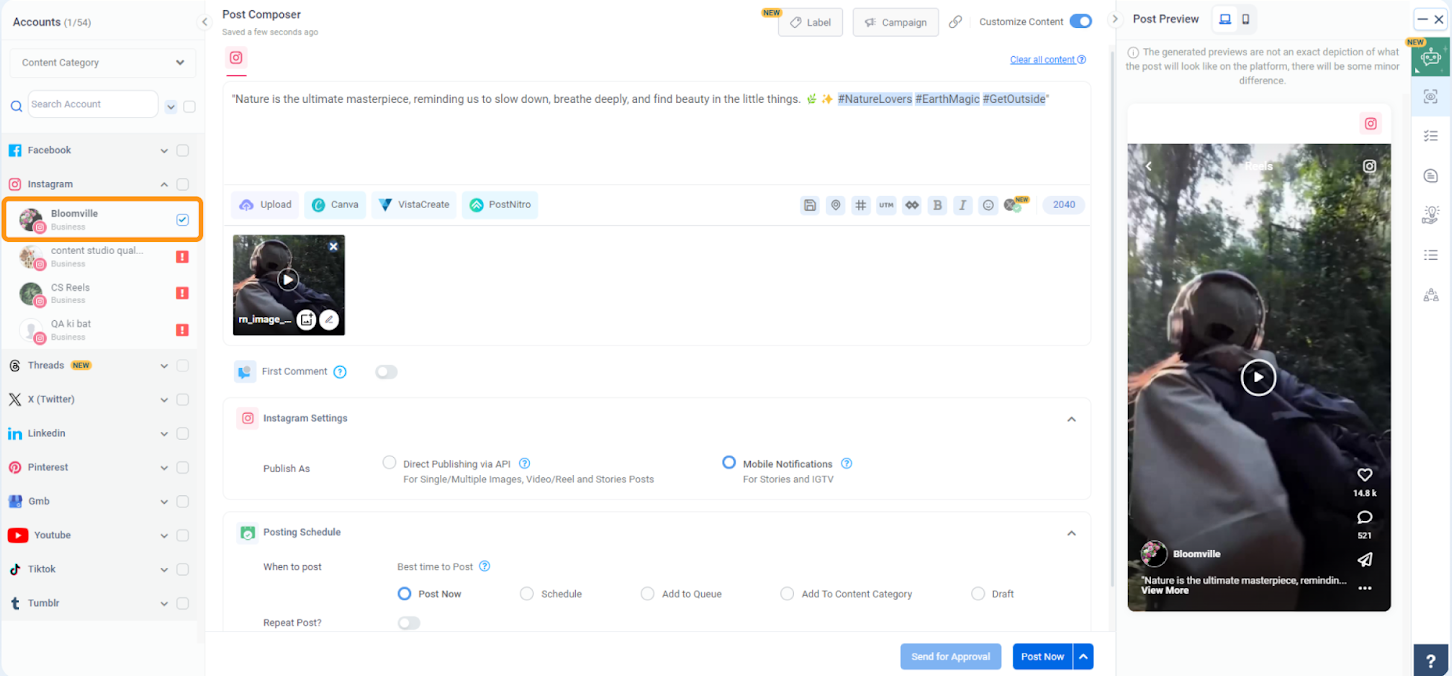
ContentStudio Instagram scheduler lets you schedule Reels ahead of time. Simply choose the date, time, caption, hashtags, and cover, and the platform will auto-publish your content. This feature helps maintain consistency without daily manual posting.
Related Read: How to schedule Instagram Reel and Story at the same time?
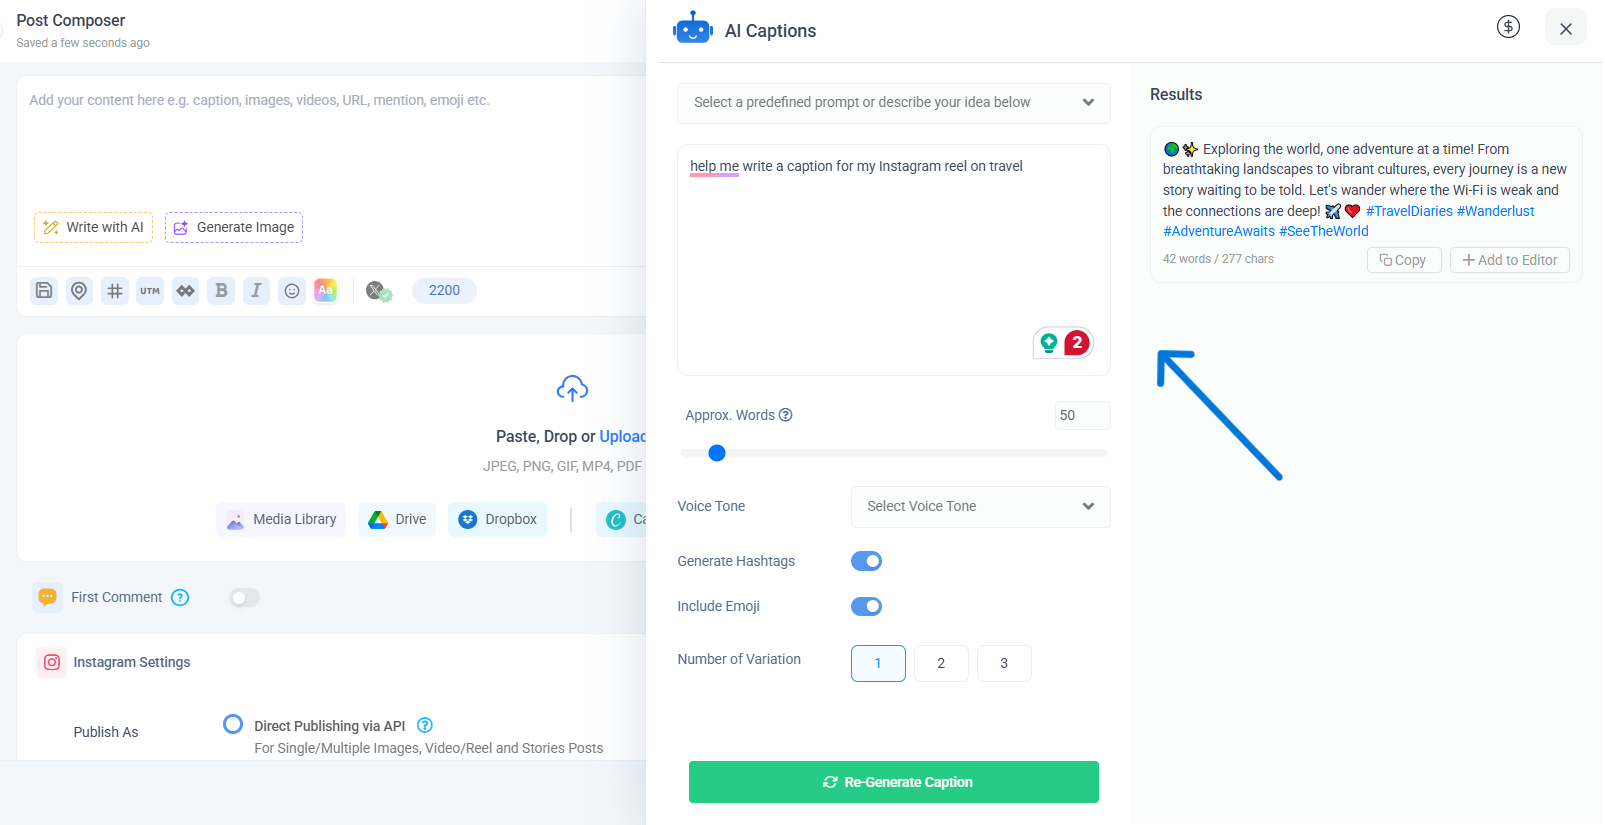
Generating engaging captions and selecting relevant hashtags can be a challenging task. ContentStudio’s AI Assistant simplifies this by providing caption suggestions or improvements through pre-made templates. It also recommends trending hashtags to boost visibility. A reviewer noted the convenience of quickly applying saved captions and hashtag groups, as well as optimizing content for discovery.
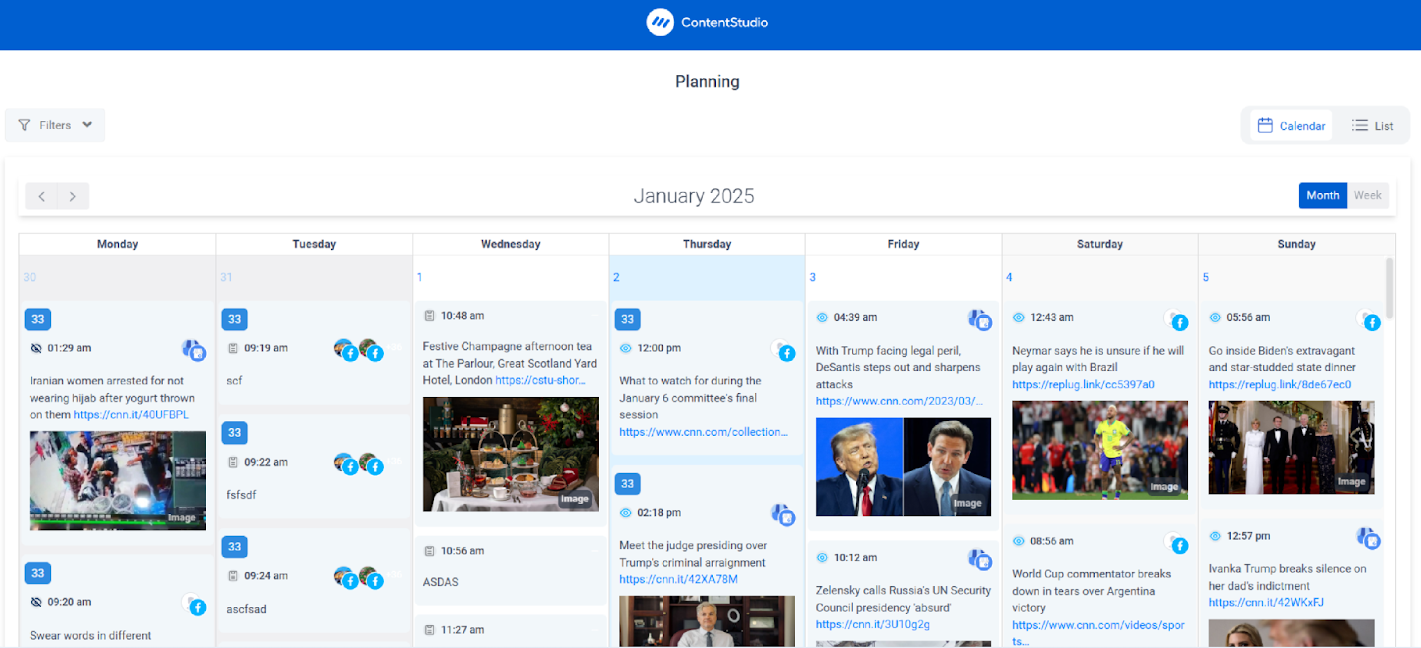
The platform offers a visual calendar for organizing Reels, Stories, and posts, making content planning intuitive and straightforward. Drag-and-drop functionality helps easily rearrange scheduled content. Ideal for managing multiple Instagram accounts or platforms, agencies appreciate its streamlined workflow, describing ContentStudio as an all-inclusive scheduling and management tool.
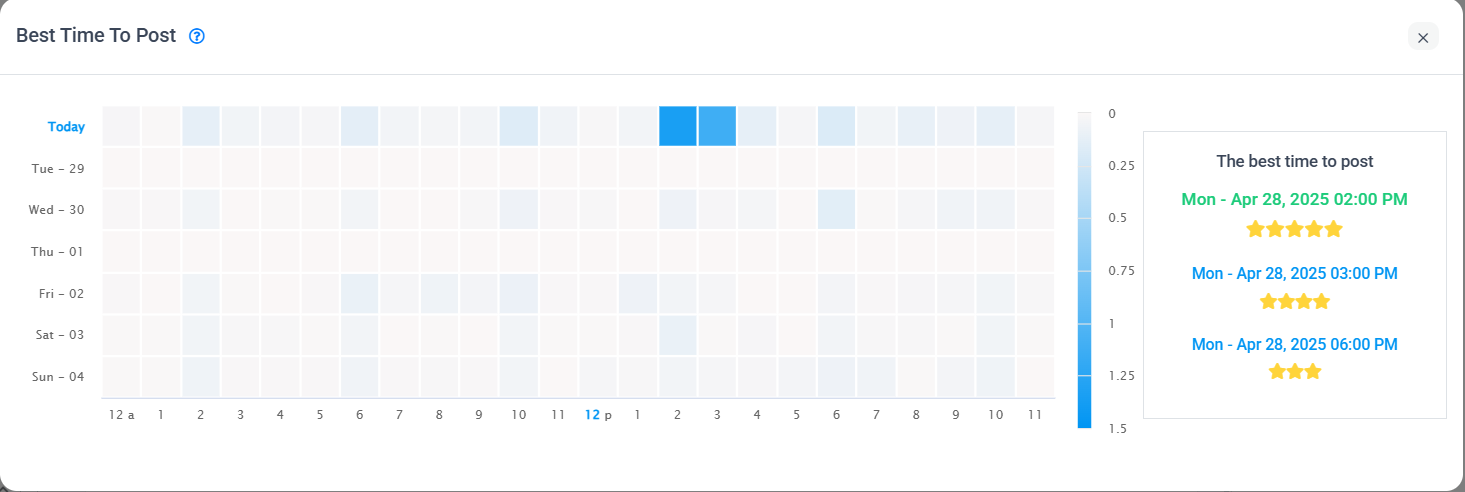
ContentStudio analyzes engagement patterns to suggest the optimal posting times, maximizing views and interactions immediately after publishing. Data-driven scheduling significantly enhances Reel performance by capitalizing on initial viewer engagement.
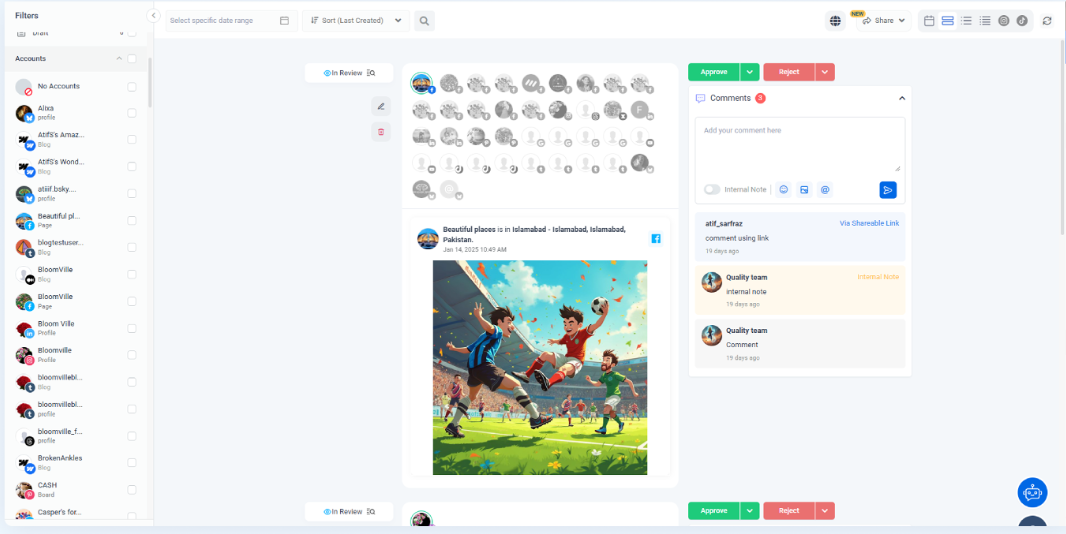
Collaboration features facilitate team approvals and feedback directly within the platform, ensuring quality control and seamless workflow. You can assign specific roles or permissions to team members, making content management efficient and clearly defined.
Detailed analytics reports provide valuable insights on Reel performance, helping refine future strategies by identifying which content resonates best with your audience. Customizable dashboards and automated reporting options simplify data analysis, saving time in measuring performance.

Creating viral Instagram Reels in 2025 requires both creativity and precision. Using the correct size (1080×1920, 9:16) ensures your content displays clearly while respecting safe zones keeps key visuals visible. Combine this with compelling storytelling, engaging captions, and trending audio for stronger viewer retention.
Planning your content and posting consistently at peak times further boosts visibility. Tools like ContentStudio streamline this process, helping you stay organized and data-driven. By aligning creativity with technical best practices, you give your Reels the best chance to succeed—capturing attention, driving engagement, and expanding your reach on Instagram.
What is the ideal Instagram Reel size and aspect ratio in 2025?
The recommended Instagram Reel size is 1080×1920 pixels with a 9:16 aspect ratio. This vertical format ensures your video fills the screen without cropping or borders. While Instagram allows other ratios, 9:16 offers the best visual presentation and is optimized for mobile viewing and algorithmic reach.
How long can my Instagram Reels be?
Instagram Reels can be as short as 3 seconds and as long as 15 minutes. The in-app camera typically allows recording up to 90 seconds or 3 minutes, depending on account access. You can upload longer videos directly from your gallery. Shorter Reels often perform better in terms of engagement and retention.
How can I make sure important parts of my Reel aren’t cut off or covered by the interface?
Keep key text and visuals away from the top, bottom, and outer edges of the 1080×1920 frame. Use a 250-pixel margin on all sides to avoid interface overlays. Always center crucial elements, especially for thumbnails, since Instagram crops cover to square in profile grids and preview views.
Does Instagram compress Reels, and how can I ensure my Reel uploads are of the highest quality?
Instagram compresses Reels by resizing and reducing the bitrate. To maintain quality, upload 1080p videos in MP4 format using the H.264 codec and AAC audio. Enable “Upload at highest quality” in settings, and keep file sizes under 650MB for smoother processing and playback across different devices and network speeds.
Plan 0 Days of Content in 0 Minutes
Create, schedule, publish and analyze your content across all your social media channels from one simple dashboard.
4.7 on Capterra • 16,500+ marketers trust ContentStudio

Wasiq Naeem is a Senior Content Strategist at ContentStudio and a research-driven content and digital marketing veteran. He writes on social media strategy, analytics, audience growth, and competitor analysis, covering topics like best posting times and competitor mapping. As a senior editor, he also reviews and fact-checks articles for depth and accuracy.
View all posts by Wasiq NaeemRecommended for you
10 Social Media Goals For Marketers

How to Make Money on Instagram in 2026 (9 Proven Ways)

Instagram marketing: The complete 2026 guide
The ultimate Instagram ads guide: Types, costs, and strategy for 2026

