
How to post a video on Facebook in 2026: Step-by-step guide
Feb 3, 20268 minutes
ContentStudio API plan is now available. Create automations using Claude, Zapier, n8n, make, etc. Explore plan!
Written by
Abdullah MansoorPublished
Updated
Whether you manage a personal blog or run a business website, keeping your audience engaged with regular blog posts can be challenging. That’s where scheduling tools like ContentStudio come into play.
By planning and scheduling your blog posts ahead of time, you ensure that your content goes live at the right moment, even when you’re busy with other tasks.
Webflow is a popular website design and CMS platform that provides a powerful way to manage and publish content.
By integrating Webflow with ContentStudio, you can simplify the process by allowing you to create, schedule, and automate your blog posts on Webflow, all from a centralized dashboard.
In this guide, we’ll walk you through the process of scheduling a blog post on Webflow using ContentStudio.
The easiest way to manage and grow your social channels.
Try ContentStudio for FREE
Scheduling your blog posts offers several advantages that can boost your content strategy and streamline your workflow. Here are a few key reasons why scheduling your blog posts on Webflow can be a game-changer:
Consistency is crucial when it comes to building an engaged audience. Regular blog updates keep your readers coming back for more and help establish trust in your brand or website. With scheduling, you can plan your posts in advance and maintain a steady publishing rhythm without manually posting each time.
Every audience has specific times when they are most active online. By scheduling your blog posts, you can ensure that they go live at peak traffic times, maximizing visibility and engagement. This is especially useful if your audience is in different time zones or if you want to target specific times of day.
Managing a blog can be time-consuming, especially when juggling other tasks. Scheduling allows you to batch-create and queue up posts in advance, freeing up time for other priorities. This not only reduces the pressure of last-minute content creation but also gives you peace of mind knowing your posts are ready to go.
With a content schedule in place, it’s easier to plan your editorial calendar and align your posts with upcoming events, product launches, or marketing campaigns. This allows for a more strategic approach to content creation, ensuring that each post serves a purpose within your overall marketing plan.
Related Read: A complete guide to content creation in 2024
Webflow’s CMS is already a robust platform for managing content, but combining it with a scheduling tool like ContentStudio takes automation to the next level. You can focus on creating high-quality content while letting the tools handle the logistics of posting at the perfect time.
By scheduling your Webflow blog posts with ContentStudio, you can simplify your content management process, stay organized, and make sure your audience receives your updates exactly when they need them.
You must integrate the two platforms before you can schedule a blog post on Webflow through ContentStudio. This allows ContentStudio to publish directly to your Webflow blog.
Follow these simple steps to set up the integration:
To begin, make sure you have a project set up in Webflow. If you already have a project, skip to the next step. If not, here’s how to set it up:
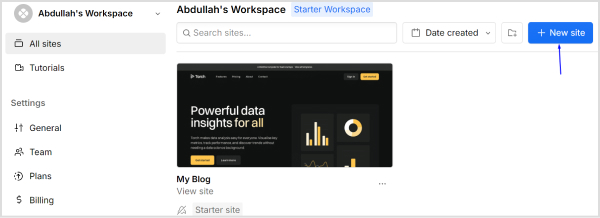
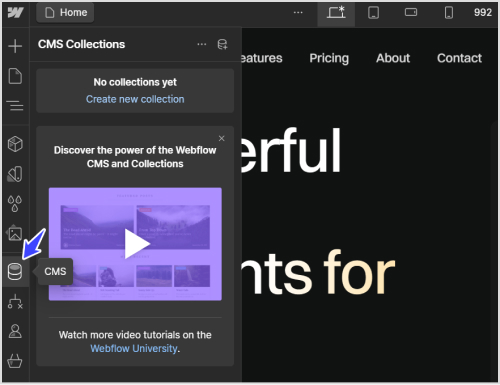
You can open the Webflow editor to manage your blog’s content and design.
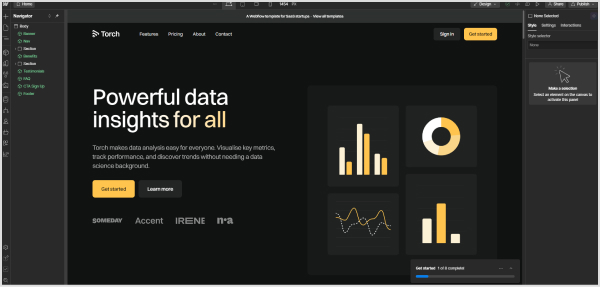
Once your project is set up, select the project you want to integrate with ContentStudio. This will open the Webflow editor, where you can manage your blog’s content.
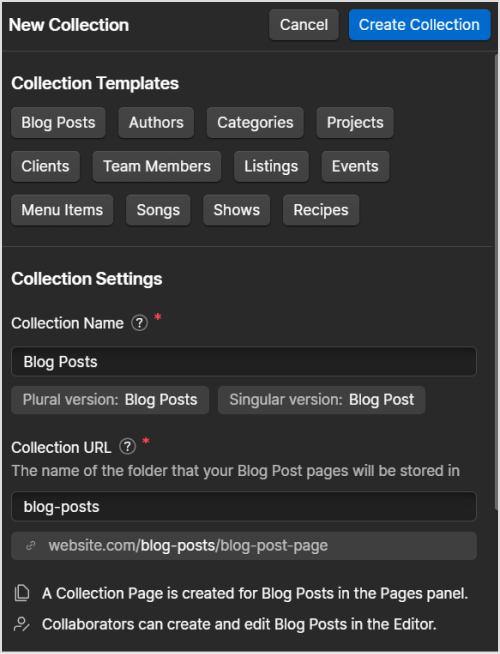
Next, you’ll need to configure your Webflow CMS (Content Management System) for publishing. Here’s how:
Now that your Webflow project and CMS are ready, follow these steps to integrate them with ContentStudio:


You will be redirected to the Webflow authorization page, where you’ll need to grant ContentStudio access to your Webflow account.
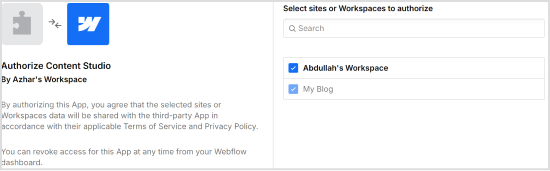
Once the connection is authorized, your blog will now show up under the Webflow section, which means it is connected to ContentStudio.

Once your Webflow blog is successfully connected to ContentStudio, you can easily create and schedule your blog posts.
Follow these simple steps to ensure your content is optimized and scheduled to go live at the perfect time.
From the navigation bar, hover over the Compose option and select Blog Post. This will open the post editor, where you can create and prepare your blog post for publishing.

In the content editor, you can either manually write your blog post or make use of ContentStudio’s AI writing assistant to help you draft high-quality content more quickly. Make sure your blog post is well-structured, engaging, and provides value to your readers. You can also insert headings, images, and any other media needed for your post.

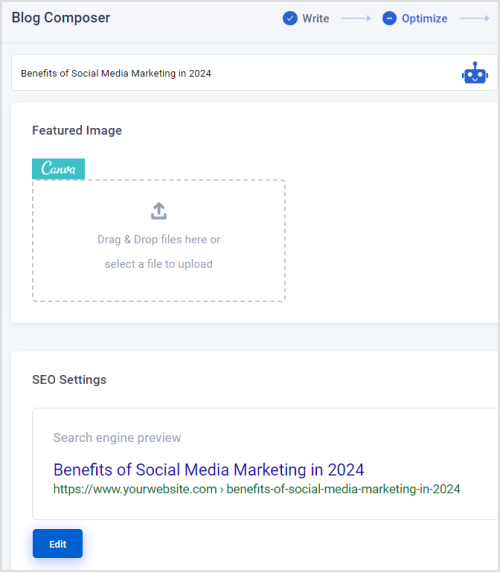
To ensure your blog post is optimized for search engines, fill in the SEO description. This is the short snippet that will appear in search results and should include your target keywords.
Moreover, don’t forget to add a featured image that represents your blog post. This image will be displayed as a thumbnail on your blog and can enhance your post’s visibility.
After finalizing your content, it’s time to set up the scheduling. Under the Primary Channel option, select Webflow from the list.
Next, choose the specific blog name associated with your Webflow project where you want the post to be published.
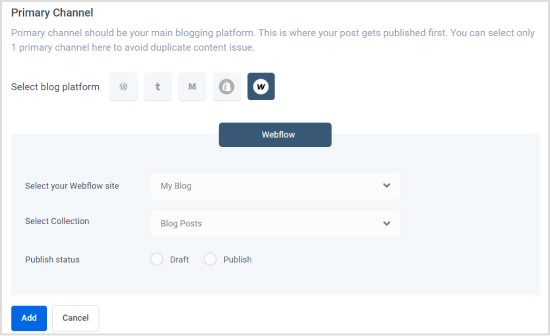
Choose your desired date and time for publishing the blog post. If you want to publish the same content on multiple platforms, you can add additional channels using the Secondary Channels option. Moreover, you can promote your blog posts on social media accounts as well.

Have a final look at the selected channel and scheduled time to make sure you have made the right choice. Click on the Great, Publish This! button to complete the process.

By following these steps, you can seamlessly schedule your Webflow blog posts using ContentStudio, ensuring that your content is published at the right moment for maximum impact.
It’s important to follow some best practices for content optimization to maximize the effectiveness of your scheduled blog posts on Webflow. These tips will help your posts perform well both in terms of SEO and audience engagement:
Ensure your blog titles are both engaging and optimized for search engines by including relevant keywords. Your SEO descriptions should provide a concise, keyword-rich summary of your post to improve its ranking in search results.
Related Read: Top AI tools and strategies for SEO in 2024
Visual content, such as images and infographics, can significantly enhance the appeal of your blog posts. Use high-quality, relevant, and engaging visuals that add value to your content and improve reader experience.
Internal links help your readers navigate your blog and keep them on your site longer. Link to related blog posts or pages within your website to guide readers to more valuable content and improve your site’s overall SEO.
Organizing your blog posts using categories and tags improves site navigation and helps search engines better understand the structure of your website. Make sure each post is appropriately categorized and tagged for optimal visibility.
Also Read: Optimize your social strategy with ContentStudio’s label performance analytics
Scheduling blog posts on Webflow using ContentStudio is an efficient way to manage your content publishing process. By integrating these platforms, you can streamline your workflows, optimize your posts for SEO, and ensure timely delivery of your content across multiple channels.
With features like AI content writing, multi-platform scheduling, and in-depth analytics, ContentStudio empowers you to focus on creating engaging and high-performing content.
By following the steps outlined in this guide, you’ll have a smoother and more organized blogging experience, helping you to grow your audience and increase your online visibility.
Can I edit scheduled posts in Webflow after scheduling them with ContentStudio?
Yes, you can edit your posts directly in Webflow after they’ve been scheduled via ContentStudio. Any changes you make in the post will be reflected when it is published.
Can I schedule a post on Webflow and other social media platforms at the same time?
Yes, ContentStudio allows you to schedule blog posts on Webflow and simultaneously share them across various social media channels.
What happens if my Webflow integration fails during scheduling?
If the integration fails, ContentStudio will notify you with an error message. Ensure that your Webflow API connection is active and that the necessary CMS fields (like the Description field) are correctly set up.
Can I reschedule a Webflow blog post after it’s already been scheduled?
Yes, you can easily reschedule any blog post from the ContentStudio dashboard. Just go to the scheduled post and adjust the publishing time as needed.
Does ContentStudio support scheduling multiple Webflow projects?
Yes, ContentStudio allows you to manage and schedule posts across multiple Webflow projects if you have more than one connected to your account.
Plan 0 Days of Content in 0 Minutes
Create, schedule, publish and analyze your content across all your social media channels from one simple dashboard.
4.7 on Capterra • 16,500+ marketers trust ContentStudio

Abdullah Mansoor is a Senior Content Writer at ContentStudio with a proven track record creating engaging content across SaaS, technology, marketing, and e-commerce. He focuses on Instagram growth, how-to guides, carousel posts, user-generated content, and white-label social media management, and reviews blog content for structure, clarity, accuracy, and a consistent brand voice.
View all posts by Abdullah MansoorRecommended for you
How to post a video on Facebook in 2026: Step-by-step guide
How to turn off active status on Instagram in 2026 (Step-by-step guide)
How to write and publish LinkedIn articles that build authority

How to start a social media marketing agency in 2026

