How to calculate affiliate earnings: Commissions and earning breakdown
Oct 6, 202612 minutes

Written by
Saif AliUpdated
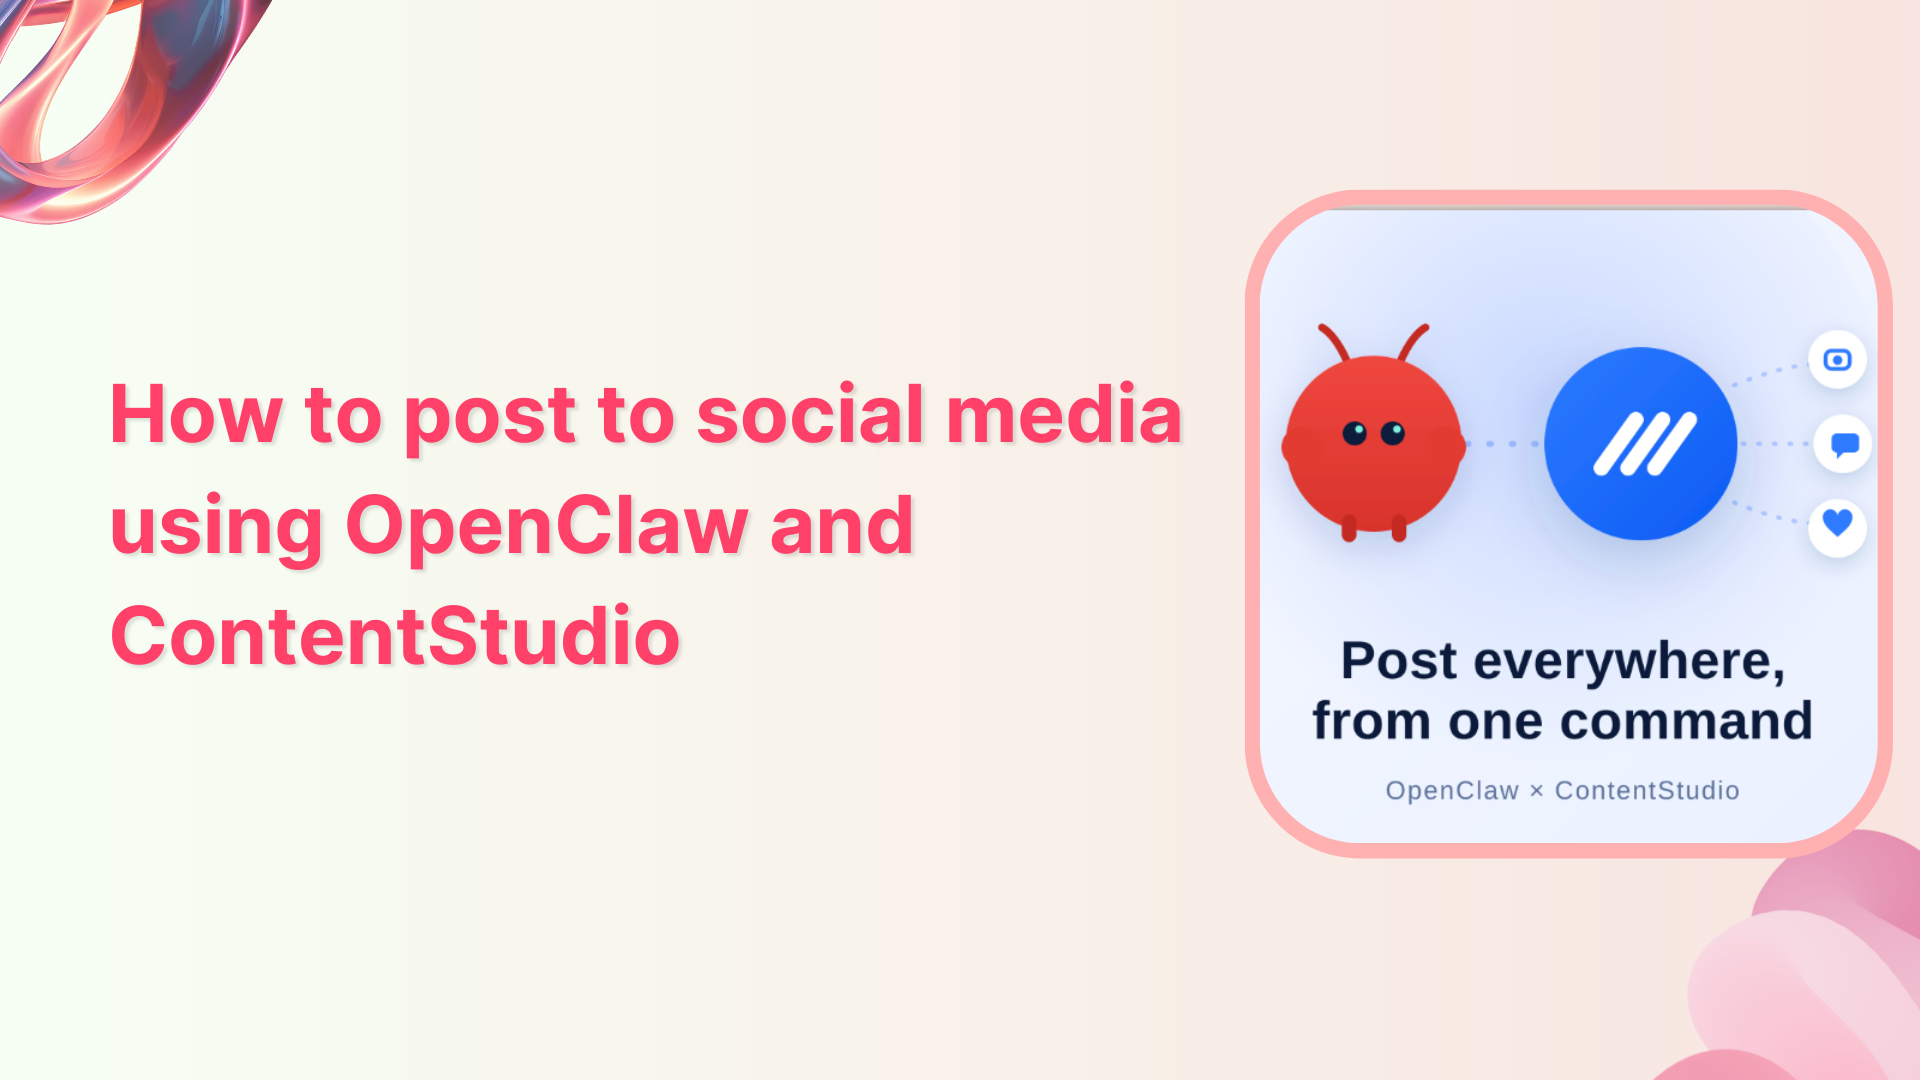
Most social media tools ask you to open a dashboard, click into a composer, upload your media, write your caption, pick your accounts, and set a schedule. That is fine when you are at your desk, and less fine when you are away from it and a post needs to go out.
OpenClaw changes the starting point. It is a self-hosted AI agent you talk to in plain language, and once you connect it to ContentStudio, you can run your whole publishing workflow from a chat message.
This guide walks through the whole process, from a clean setup to a scheduled post. By the end, you will have installed the ContentStudio skill, connected your account, and sent your first post live through nothing but a chat conversation.
It helps to understand the two pieces before you start, because they play different roles.
OpenClaw is the agent. It runs on your own machine, connects to a chat app like Telegram, WhatsApp, or Discord, and understands what you ask it in ordinary language. When you say “schedule this for Tuesday at 9am,” OpenClaw reads your message, looks at your media, and works out what needs to happen.
ContentStudio is where the work actually lands. The agent does not publish to Instagram or LinkedIn on its own. It calls ContentStudio through the ContentStudio OpenClaw integration, and ContentStudio handles the real publishing across more than 10 social networks, formatting each post for its network and putting it in your queue.
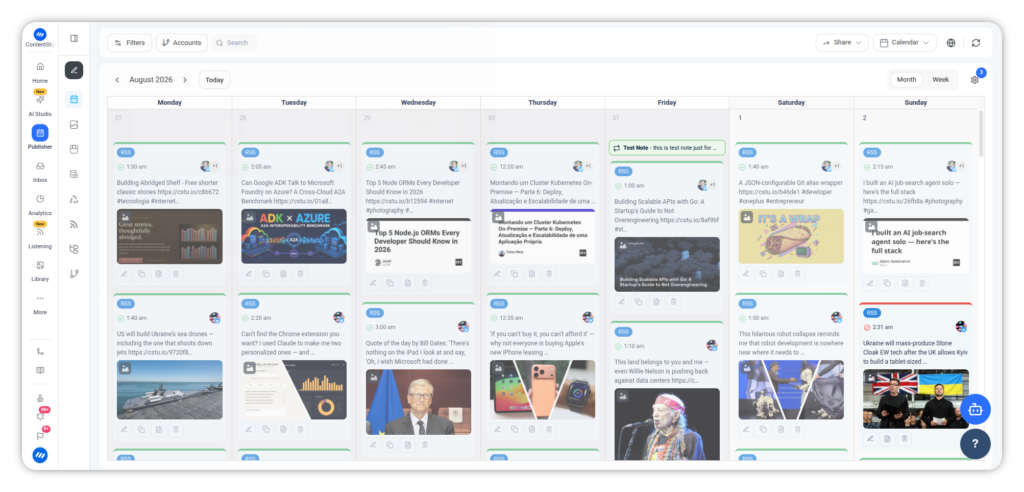
A simple way to hold it in your head: OpenClaw is the person you talk to, and ContentStudio is the system doing the heavy lifting. You never touch an API yourself, and for everyday posting you never open the dashboard either.
Here is what the integration lets your agent do once it is set up:
This is a technical integration, so there are a few things to have in place before the first command. None of them take long, but it saves frustration to line them up first.
You will need a ContentStudio account with an API key, which you generate inside the dashboard. You will need the OpenClaw agent installed on a machine that can run it, along with Node.js, which the installer handles for you if it is not already present.
You will need an AI model provider key to power the agent, and an account on a chat app that OpenClaw supports. This guide uses Telegram in its examples, but the same steps apply to WhatsApp, Discord, and the other supported channels.
If OpenClaw is completely new to you, the short version is that it is an open agent framework you host yourself, and skills are the add-ons that teach it to work with specific tools. The ContentStudio skill is what teaches it to post to social media.
With that in place, the setup itself is three steps.
The openclaw skill is what gives your OpenClaw agent access to ContentStudio’s features. Installing it adds the skill file and its rules to your agent. Run this from your terminal:
openclaw skills install @contentstudio-official/contentstudioThat pulls the official skill from ClawHub, OpenClaw’s skills marketplace. Once it finishes, your agent knows how to work with workspaces, social accounts, posts, approvals, your content library, and your campaigns and labels.
In practice, this means the agent can now understand a request like “draft a LinkedIn post” and know exactly which actions to take.
The skill is open source under the MIT-0 license, so if you or someone on your team wants to read exactly what it does before installing, the full source is public. That matters more than it might seem, and we will come back to it in the security section.
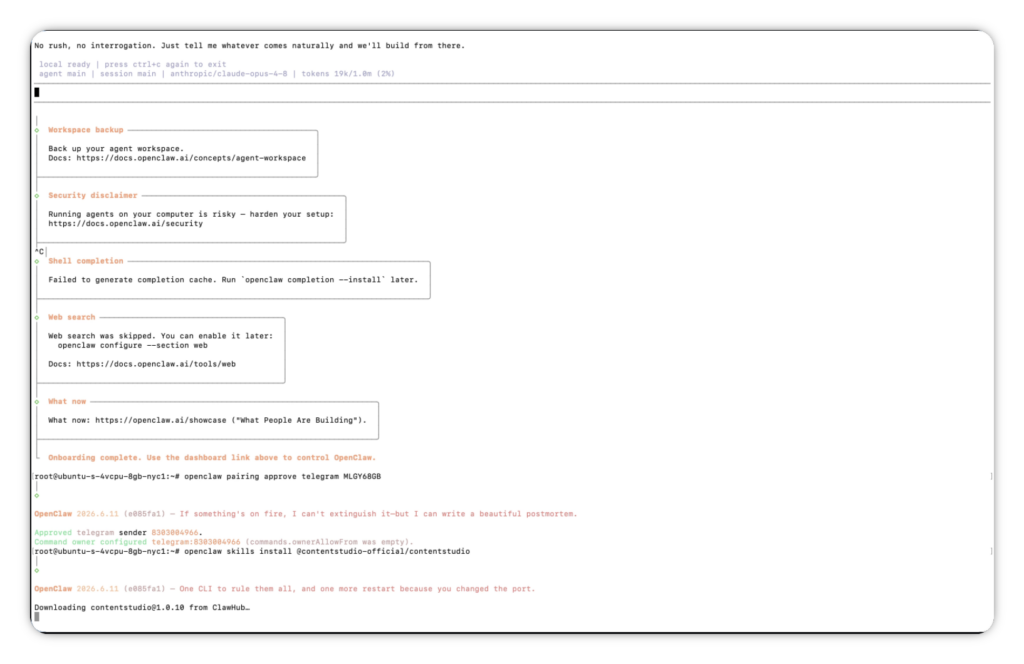
The skill does not talk to ContentStudio directly. It drives a command-line tool, the ContentStudio CLI, and that CLI is what actually communicates with ContentStudio’s public API. Install it globally with npm:
npm install -g contentstudio-cliYou will not be typing CLI commands yourself during normal use. The agent handles that for you every time you send it a message. Installing the CLI simply gives the skill the engine it needs to run. Think of it as putting the tools in the toolbox so the agent has something to pick up.
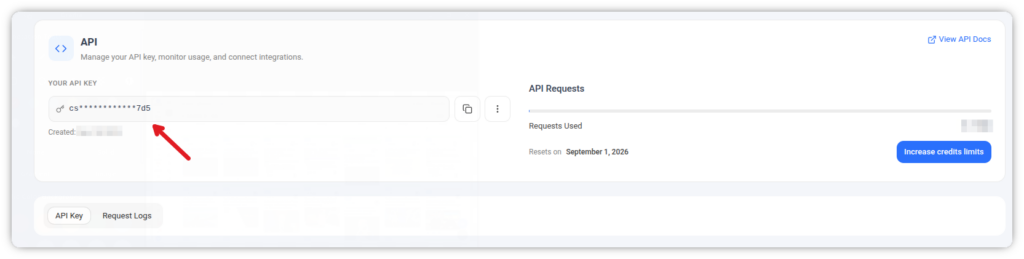
The last setup step connects everything to your ContentStudio account. First, generate an API key from your ContentStudio dashboard under Settings, then API Keys. ContentStudio keys start with cs_, so you will know it when you see it.
For quick local testing, you can log in interactively, which stores the key in the CLI config file:
contentstudio auth:login --api-key cs_...There is one detail worth flagging if you are running OpenClaw as a background service rather than testing on your own laptop. A shell export does not carry over into a running service process, so the key you set in your terminal will not reach the agent.
In that case, set the key as an environment variable named CONTENTSTUDIO_API_KEY in the agent’s actual environment, then restart the service so it picks the value up. The CLI reads that variable, and it takes precedence over the config file.
Once you are authenticated, confirm that a workspace is selected. If your account has more than one workspace, the agent needs to know which one it is posting to, and ContentStudio confirms the active workspace before it makes any change.
At this point, setup is done. Everything from here happens in your chat app.
Open the chat app you connected to, e.g., Telegram to OpenClaw, and start a conversation with your bot. You can keep it casual, the way you would message a colleague:
I want to schedule some posts today
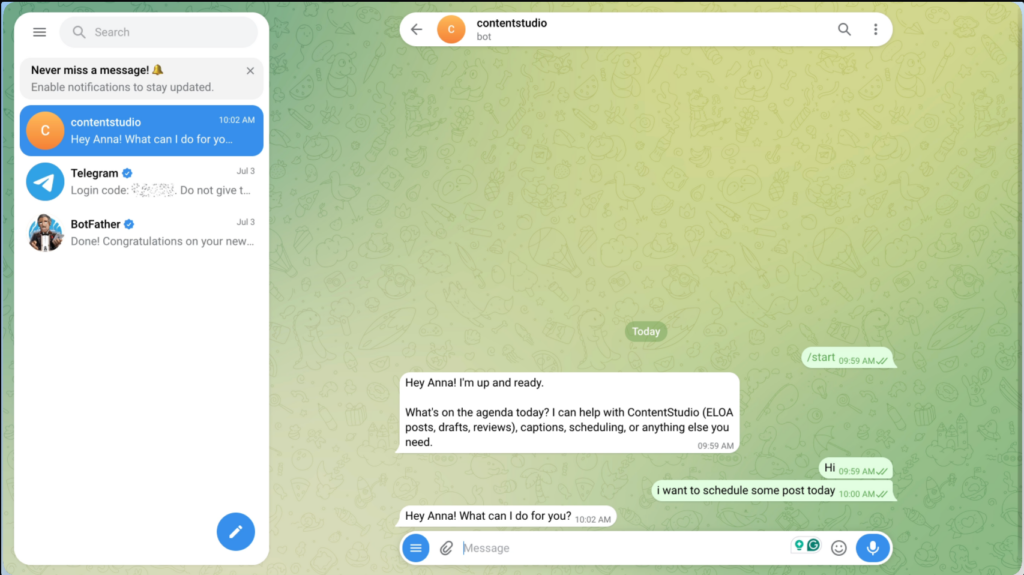
The agent will ask what it needs to know: how many posts you want, whether you have captions ready or want it to write them, what media goes with each one, the dates and times, and which accounts to publish to. You can answer all of that up front or work through it one piece at a time.
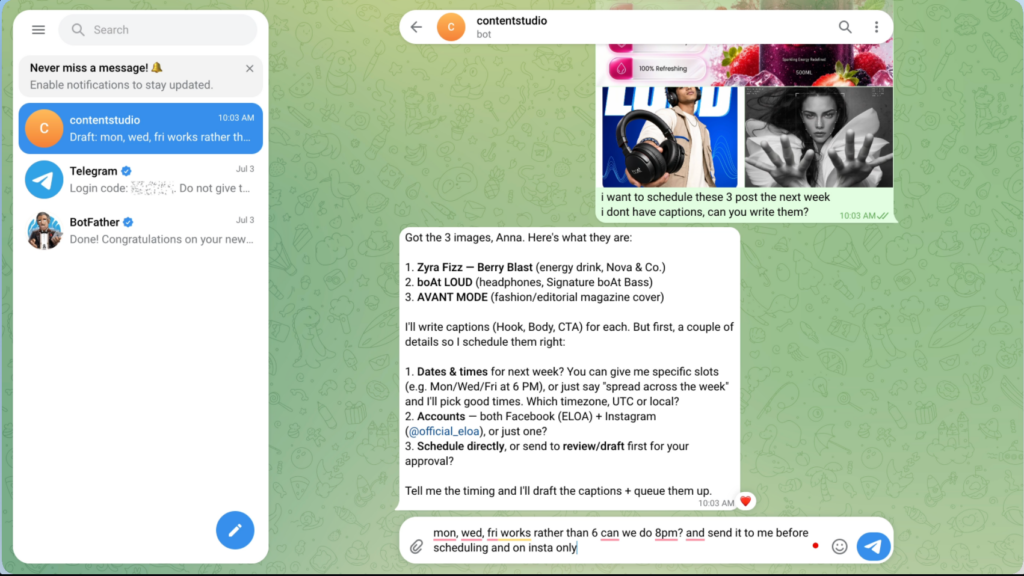
When you are ready, attach your media. Drop the images or videos straight into the chat. The agent reads each file and tells you what it sees, which is more useful than it sounds. If you are scheduling three images, having the agent describe each one back to you means you both know which post is which before anything is written.
If your media lives online rather than on your device, point the agent at a URL and it will import from there:
Import the image from https://example.com/launch-banner.jpg and use it for the first post
And if you are only posting text, you can skip media entirely. Not every post needs an image.
With your media in place, you have two ways to handle captions.
If you already have your copy written, paste it in, and the agent uses it as is. If you do not, ask the agent to write the captions for you:
Write captions for these three posts, with a hook, body, and a call to action for each
Make the second caption shorter and drop the hashtags
The captions are a starting point you shape, not a final answer you have to accept.
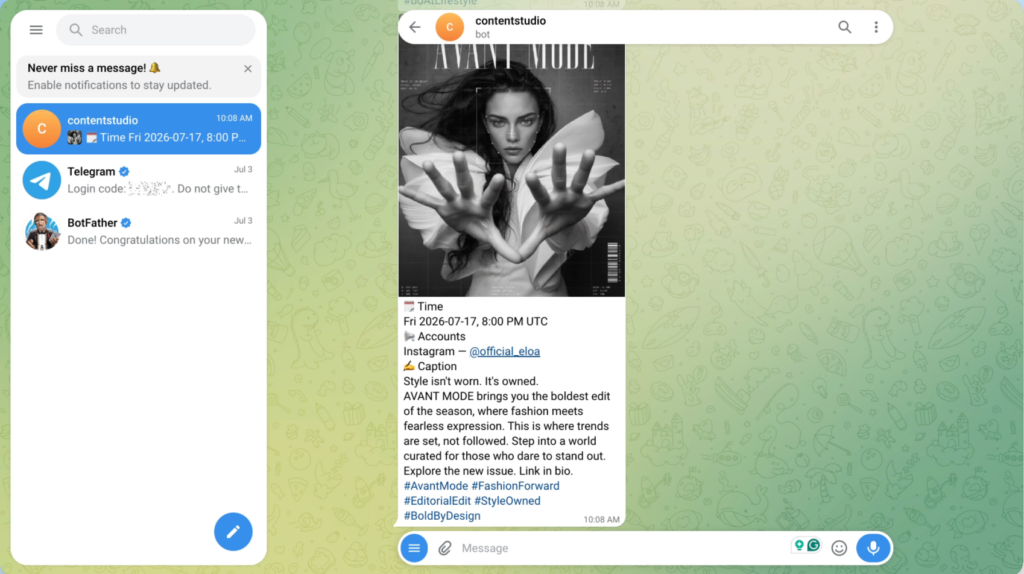
Before anything goes into your queue, the agent lays out the full plan: the dates, the times, the accounts, and the captions for every post. You read it back and confirm, and only then does it queue everything in ContentStudio.
You have two ways for posts to go out, and the difference matters depending on how you work.
The first is to schedule directly. The agent queues the posts, and they publish at the times you set, with no further action needed. This is the path when you are posting for yourself, and you are confident in the plan.
The second is to send posts for review, or as drafts first, so nothing publishes until it is approved. This is the path when you want a second look, whether that is your own eyes before it goes live or a teammate signing off. Just tell the agent which path you want:
Send these to me for approval first instead of scheduling them
Below is a rough shape of how a scheduling conversation flows, so you can picture it before you try it yourself.
| You say | The agent does |
| “I want to schedule some posts today” | Asks how many, what media, captions, timing, and accounts |
| Drop in three images | Reads each file and describes what it sees |
| “Write captions for these” | Drafts a hook, body, and CTA for each post |
| “Next week, Mon/Wed/Fri at 8pm, Instagram only” | Sets the timing and target account |
| “Send them to me for approval first” | Queues them as pending review instead of publishing |
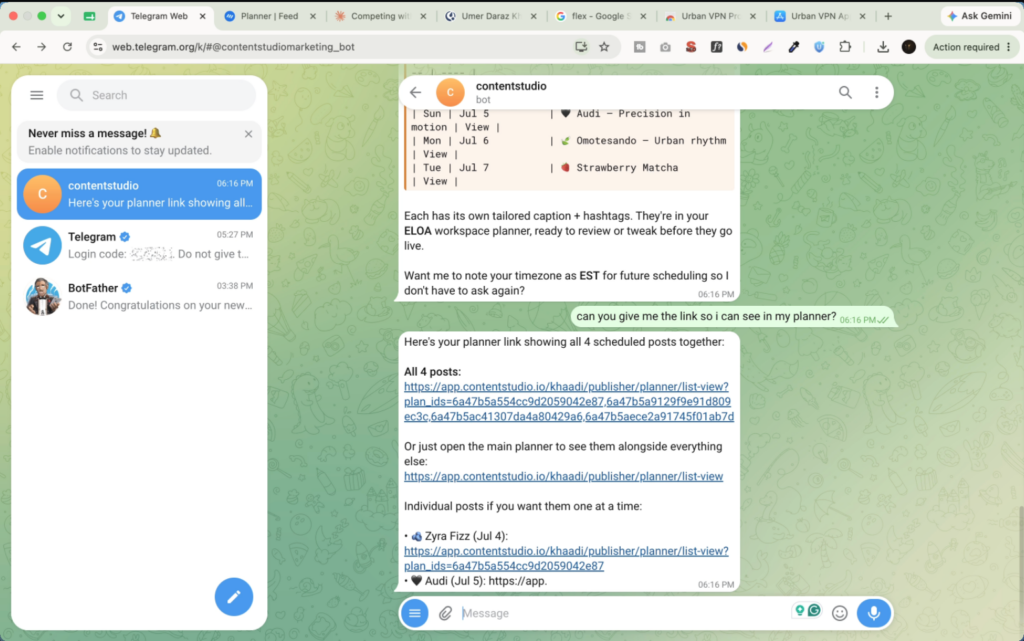
If your team reviews posts before they publish, the whole approval loop runs from chat too. This is genuinely useful when the person scheduling a post is not the person who signs off on it, which is the normal state of affairs at most agencies and marketing teams.
Start by asking the agent what is waiting on review:
What posts do I have pending approval?
It lists the posts pending approval along with their scheduled dates and accounts, so you can see everything that needs a decision in one place.
The clever part is how you approve. You reply directly to a specific post’s message in the chat and say a word or two:
approve
The agent matches your reply to the right post using that post’s image, its scheduled time, and its account. There are no post IDs to copy and no dashboard to open. Replying to the message is how the agent knows exactly which post you mean, even when several are pending at once.
You can work through approvals one at a time, or clear a batch in one go. If you want to approve everything except one post, you can do that in a single message and the agent will action the rest together:
Reject the LOUD post and approve everything else
It is a fair question to ask before you hand posting duties to an agent, and the integration is built with a few specific protections that are worth knowing about.
Your credentials never leave ContentStudio. The agent works through a single scoped API key that connects only to ContentStudio’s public API, so your actual social account passwords are never exposed to it. You can revoke or replace that key at any time without touching your social logins.
Every write is previewed before it happens. The skill runs a dry-run before any create, update, delete, approval, or upload action reaches the API, which gives you a chance to catch a wrong date or a wrong account before it becomes a real post. The agent also confirms the active workspace before making changes, so posts, approvals, and updates always go to the correct client or brand.
Finally, the skill is open source under the MIT-0 license and restricted to least-privilege permissions. Anyone on your team can inspect, audit, and verify exactly what it does, line by line. For a tool that touches your public presence, being able to read the code rather than trust a black box is a meaningful difference.
The appeal of this setup is not that it does something a dashboard cannot. It is that it removes the friction between deciding to post and the post being scheduled. You think of something, you message your agent, and it is queued. That is the whole loop.
If you want to try it, you can start a free trial of ContentStudio and follow the three setup steps above to connect your OpenClaw agent.
Yes, with the right setup. The ContentStudio skill works through a single scoped API key that only reaches ContentStudio’s public API, so your social account passwords are never shared with the agent, and every write runs a dry-run preview before it happens.
You can publish to more than 10 networks, including Instagram, Facebook, X, LinkedIn, TikTok, YouTube, Pinterest, Google Business, Threads, Bluesky, and Tumblr. You connect an account once inside ContentStudio, and from then on your agent can reach it from chat. The same post can go to a single network or several at once.
No. The only technical part is the one-time setup, which is three commands you copy and paste to install the skill, install the CLI, and authenticate. After that, everything happens in plain language through your chat app, with no code and no dashboard.
The ContentStudio skill and CLI are free and open source under the MIT-0 license. What you pay for is your ContentStudio account, which starts with a seven-day free trial and does not require a credit card. You will also have your own OpenClaw hosting and AI model costs, since OpenClaw runs on your own machine.
Either works. You can attach images or videos, import media from a URL, or skip media entirely and schedule a post with just text. Tell the agent what you want, and it handles the rest.
Yes. If you do not have copy ready, ask the agent, and it drafts a hook, body, and call to action for each post, shaped around the media you attached. You can review each draft and change anything before it schedules.
Yes. Ask the agent to send posts to review or draft first instead of scheduling them directly, and nothing publishes until it is approved. This works whether you want a final check on your own posts or a teammate to sign off.
By your reply. When you reply directly to a post’s message with “approve” or “reject,” the agent matches it using that post’s image, scheduled time, and account, so there are no post IDs to copy. This also means more than one teammate can handle approvals, as long as they are on your OpenClaw allowlist.
It works on any chat app you connect to OpenClaw. The examples here use Telegram because it is the quickest to set up, but scheduling and approvals behave the same way on WhatsApp, Discord, and the other supported channels. You pick the app your team already uses.
First-time social account connections happen in the ContentStudio web app, not from chat. Once an account is connected there, your agent can manage its posts, media, and approvals from your chat app.
Plan 0 Days of Content in 0 Minutes
Create, schedule, publish and analyze your content across all your social media channels from one simple dashboard.
4.7 on Capterra • 16,500+ marketers trust ContentStudio
Saif Ali is a Content Marketing Strategist at ContentStudio with over five years of experience across SaaS, IT, and digital marketing. He specializes in SEO-led content, AI content creation, and social media strategy, and leads editorial review at ContentStudio, fact-checking and refining articles for accuracy, SEO, and a consistent brand voice.
View all posts by Saif AliRecommended for you
How to calculate affiliate earnings: Commissions and earning breakdown
YouTube Shorts analytics: Diagnose retention, swipes, and subscriber gains
Affiliate disclosure on social media: FTC rules, examples, and platform guidance
How to launch a podcast episode with Claude Code and ContentStudio