01
Auto-post from RSS
Connect any blog or news RSS feed. Every time a new item is published, Zapier creates a scheduled post in ContentStudio using the title, link, or description you map from the feed.
 Zapier Integration
Connect ContentStudio to Zapier and turn events in the apps you already use into scheduled social posts. Set a trigger once, map your fields, and let Zapier create and schedule every post in ContentStudio, without a single copy and paste.
Publishes to:
X / Twitter, Instagram, Facebook, LinkedIn, TikTok, YouTube, Pinterest, Google Business, Threads, Bluesky, Tumblr, and more.


Quick Reference
Core Capabilities
Connecting ContentStudio to Zapier lets other apps create and schedule your social posts automatically. Set up a trigger once, map your fields, and every matching event turns into a post. One of many ContentStudio Integrations with the tools you already use.
Connect any blog or news RSS feed. Every time a new item is published, Zapier creates a scheduled post in ContentStudio using the title, link, or description you map from the feed.
Zapier creates and schedules a new post in your selected workspace and accounts, with caption, images, video, schedule time, and first comment pulled from your trigger app.
Remove an existing post from ContentStudio through a Zap. Pair it with any trigger so scheduled or published posts can be cleaned up automatically as part of a wider workflow.
Use the List Workspaces trigger to retrieve every workspace connected to your account, so a Zap can choose the right one to post into before it creates content.
The List Social Accounts trigger fetches the connected profiles in a workspace, giving your Zap the account IDs it needs to post to Facebook, Instagram, LinkedIn, X, and more.
The List Posts trigger returns the posts available in a workspace and can filter by status, so downstream steps can act on what is already scheduled or published.
Setup
Five short steps connect ContentStudio to Zapier and start turning events in your other apps into scheduled social posts.
In ContentStudio, go to Settings → API and copy your API key. Keep it private; it is what lets Zapier post to your account. More on the ContentStudio API page.
In Zapier, create a new Zap. Every Zap has two parts: a Trigger and an Action. Pick your trigger app, such as RSS by Zapier, and the event, such as New Item in Feed.
Choose ContentStudio as the action app and Create Social Post as the event. When Zapier asks, paste your API key to authorize the connection.
Select the connected account, then fill in the required fields. Map the caption from a trigger field such as your RSS title or description rather than typing it manually.
Run Zapier's test step. A confirmation shows the post was sent to ContentStudio. Click Publish to set the Zap live, then review it in Publisher → Posts or Publisher → Calendar.
Video Walkthrough
Prefer to watch first? This walkthrough builds a working Zap from scratch, connecting a trigger to ContentStudio's Create Social Post action and scheduling the post live, so you can follow along before you start.
Using the integration
These are real automation patterns teams use to save hours of manual posting. Set the trigger once, map the fields, and the posting happens on its own.
→ A new blog post publishes in your RSS feed.
✓ Zapier creates a scheduled ContentStudio post across your accounts, using the title and excerpt you mapped.
→ You save an article in Feedly or Pocket.
✓ The article is queued in ContentStudio with your commentary, so curating your niche takes minutes, not hours.
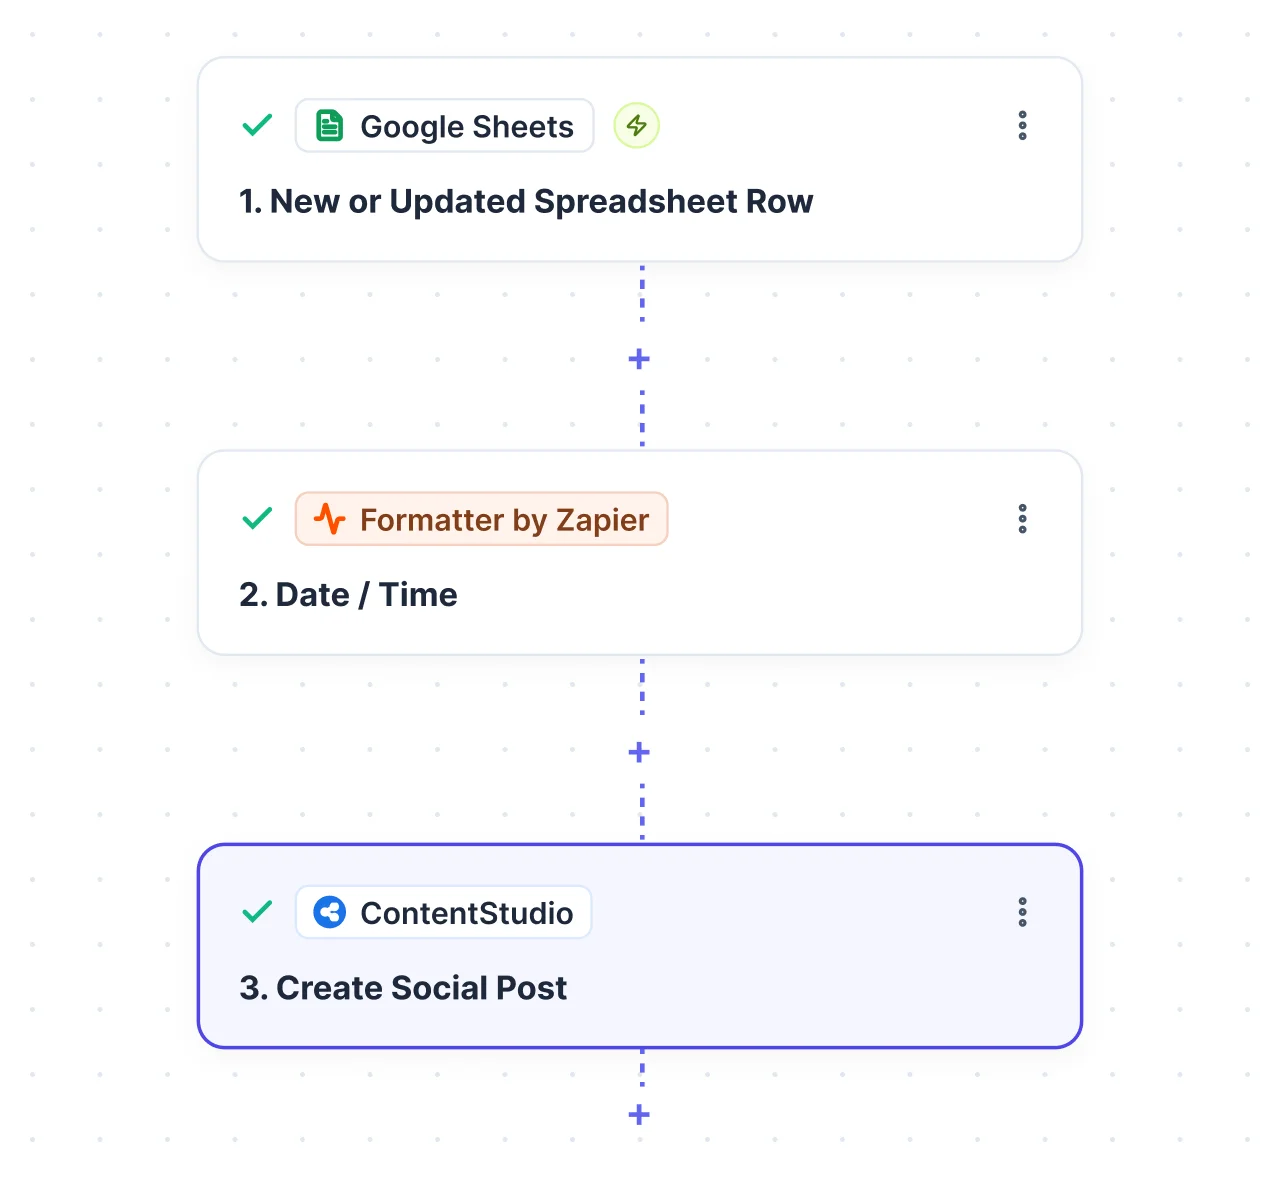
→ A teammate adds a row to your content planning Google Sheet.
✓ That row becomes a scheduled post in ContentStudio, so one person handles the actual scheduling.
→ A new event is added in Google Calendar or Airtable.
✓ Zapier triggers promotional posts in ContentStudio, so reminders and last-chance posts run on schedule.
Security & Trust
Your API key, per-account connections, and Zapier's own test step keep every automated post transparent and under your control before it goes out.
Scoped API key: Zapier connects with a ContentStudio API key that talks only to your account. Deactivate it anytime and generate a new one without touching your social account passwords.
Separate connections: You can connect multiple ContentStudio accounts in Zapier. Each account uses its own API key and its own connection, so workspaces stay cleanly separated.
Test before you publish: Zapier's test step sends a sample post and confirms it reached ContentStudio before the Zap goes live, so you can check the caption, media, and timing first.
Review in ContentStudio: Every automated post lands in Publisher → Posts and the Content Calendar, so your team can review, edit, or reschedule anything before or after it publishes.
Troubleshooting
Most issues come down to the API key, the field format, or the trigger firing more than once. Here are the common ones and how to fix them.
Your key expired or was deactivated. Generate a new one in ContentStudio settings and reconnect your Zapier account.
Check your Zap history to confirm the Zap ran, verify you selected the right workspace and accounts, and remember scheduled posts appear in the Calendar, not published posts.
The image URL must be publicly accessible. If it lives on Dropbox or Google Drive, set sharing to "anyone with the link," or host the image on your own site.
Use the format YYYY-MM-DD HH:mm:ss in 24-hour time, and remember ContentStudio uses your workspace timezone when scheduling.
You likely have more than one Zap doing similar work, or a trigger firing twice. Check your Zap history and turn off or adjust the duplicates.
FAQs
Connect ContentStudio in Zapier and let events from the apps you already use create and schedule posts on their own.